
To enable this waitlist automation, please visit Contact Us to reach support team.
After the waitlist automation is enabled, please check the setup steps below:
Note: For information about manage waitlist registration ranking, please visit Waitlist Ranking Logic
Note: The waitlist invitation email's sender name is synchronized from your agency's URL key.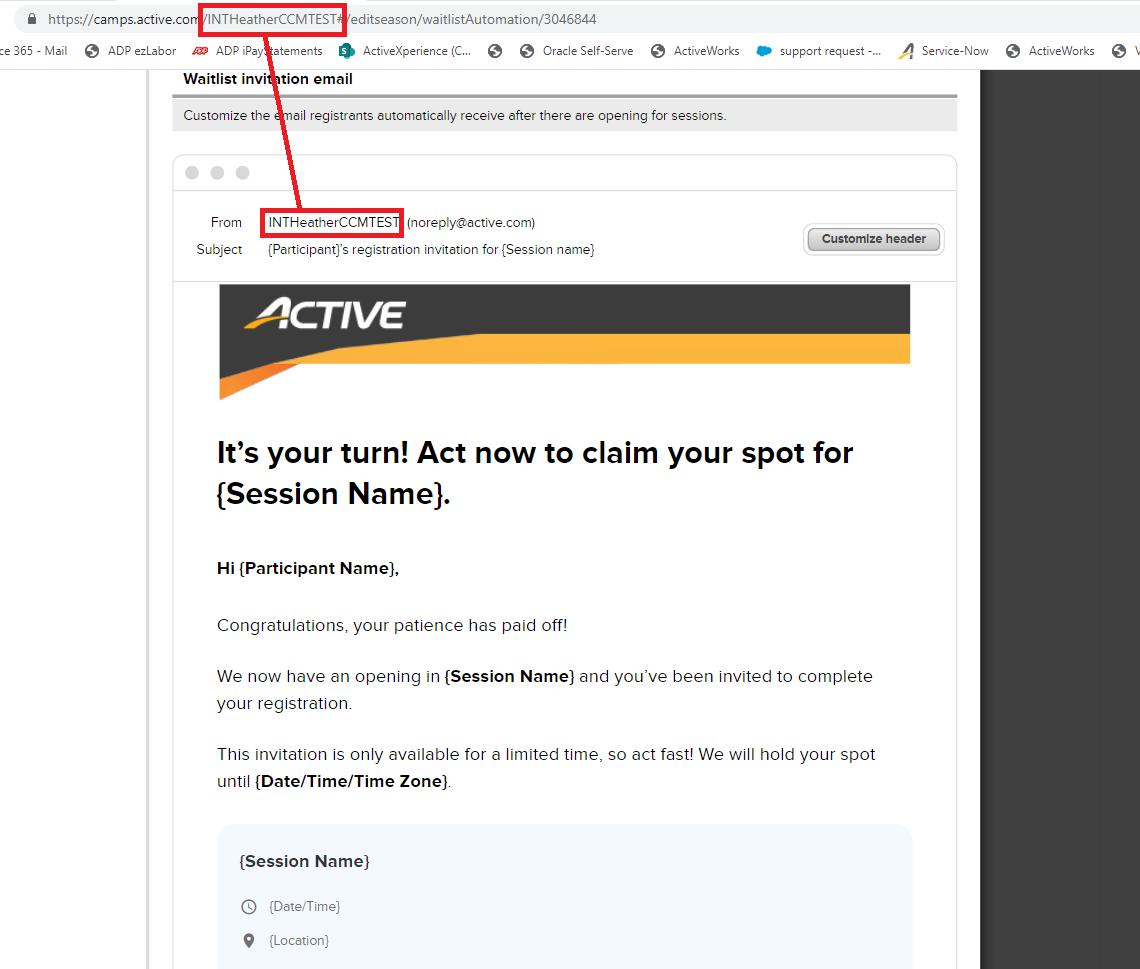
After the waitlist automation is enabled, please check the setup steps below:
- Click Setup under the season
- Click Waitlist Automation under Settings menu
- Complete Customize invitation rules to configure the following parameters:
- Invitation validity
- Waitlist automation end time
- Session applicability
- (Optional) Customize the invitation header, click Customize header
- Customize email content by editing content fonts, font sizes, styling and inserting merge fields
- (Optional) Click Reset content to reset email to default content
- Click Save and continue
Note: For information about manage waitlist registration ranking, please visit Waitlist Ranking Logic
Note: The waitlist invitation email's sender name is synchronized from your agency's URL key.

