The CUI branding of the registration form for your event can be customized. Below are instructions after Log in to ACTIVE Works with Existing ACTIVE Passport Account:
- On organization HOME page, click Settings at top right corner
- Click Custom Branding
- Click Create
- Note: You can also click on an existing template to Edit
- The system will automatically name the template based on date and time. Click Edit next to the default name at the top of the screen to rename your template
- You can change the Color, Style, Theme and more for your registration page by selecting Style and Appearance
- To copy the theme/configuration from another template, select Copy Configuration in the top right
- To preview the template on your event, select Preview in the top right
- To reset the template and revert to the Active default template, click Reset in the top right.
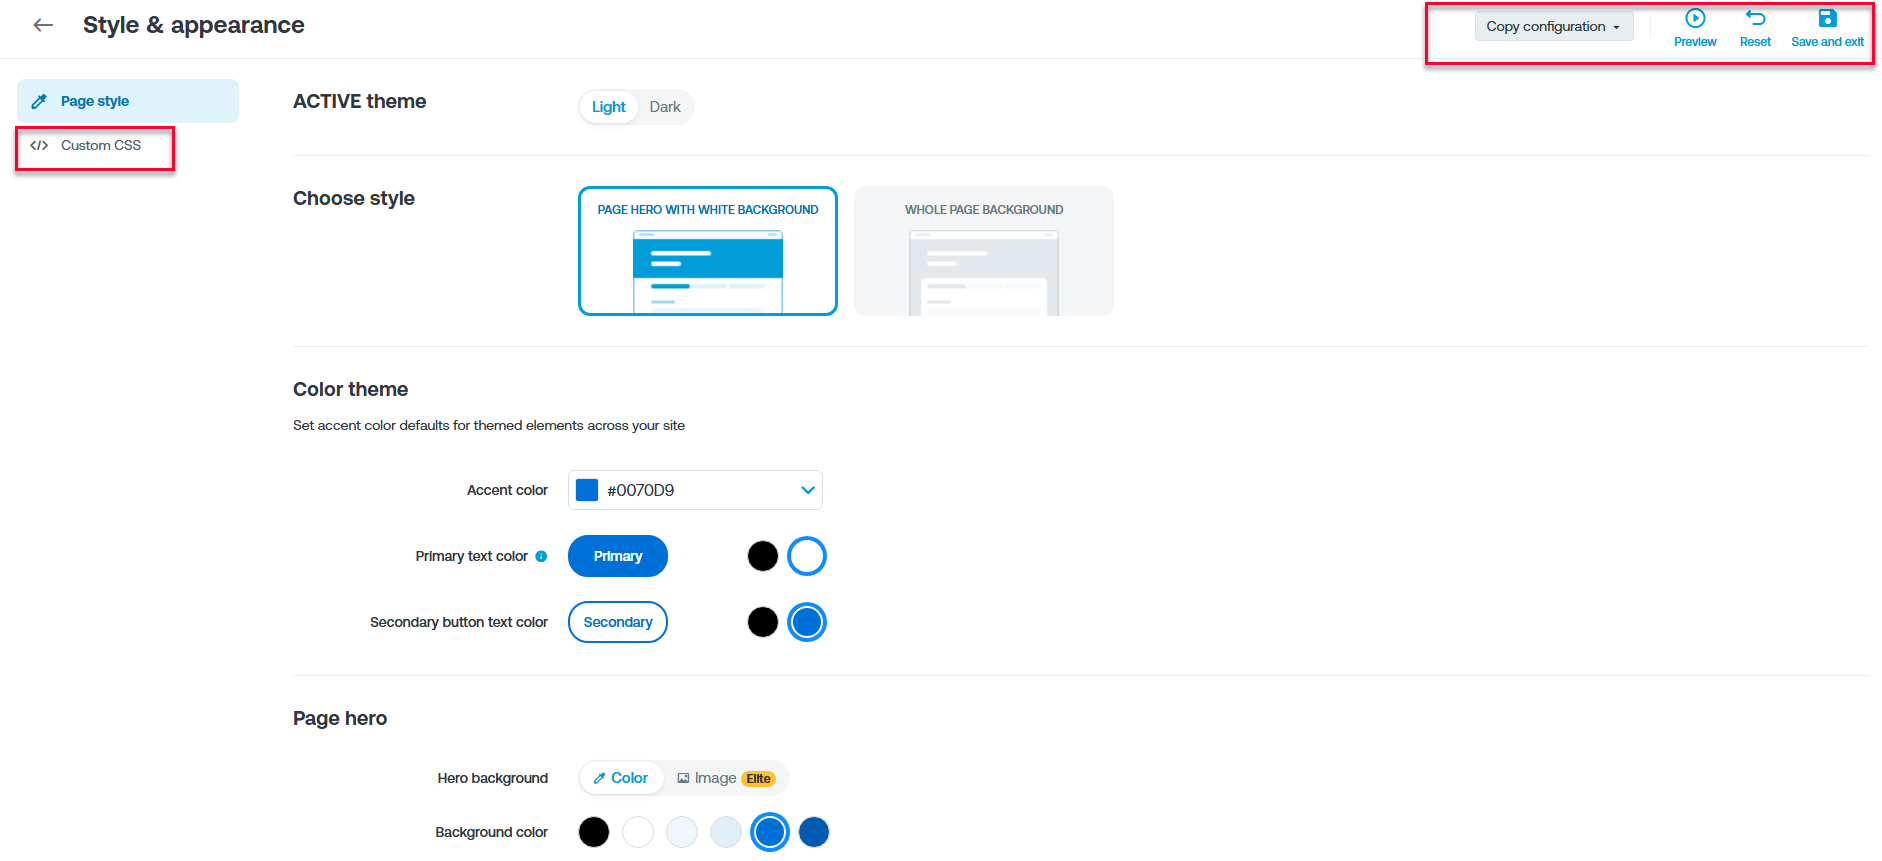
- Select Custom CSS to add your own unique style of branding
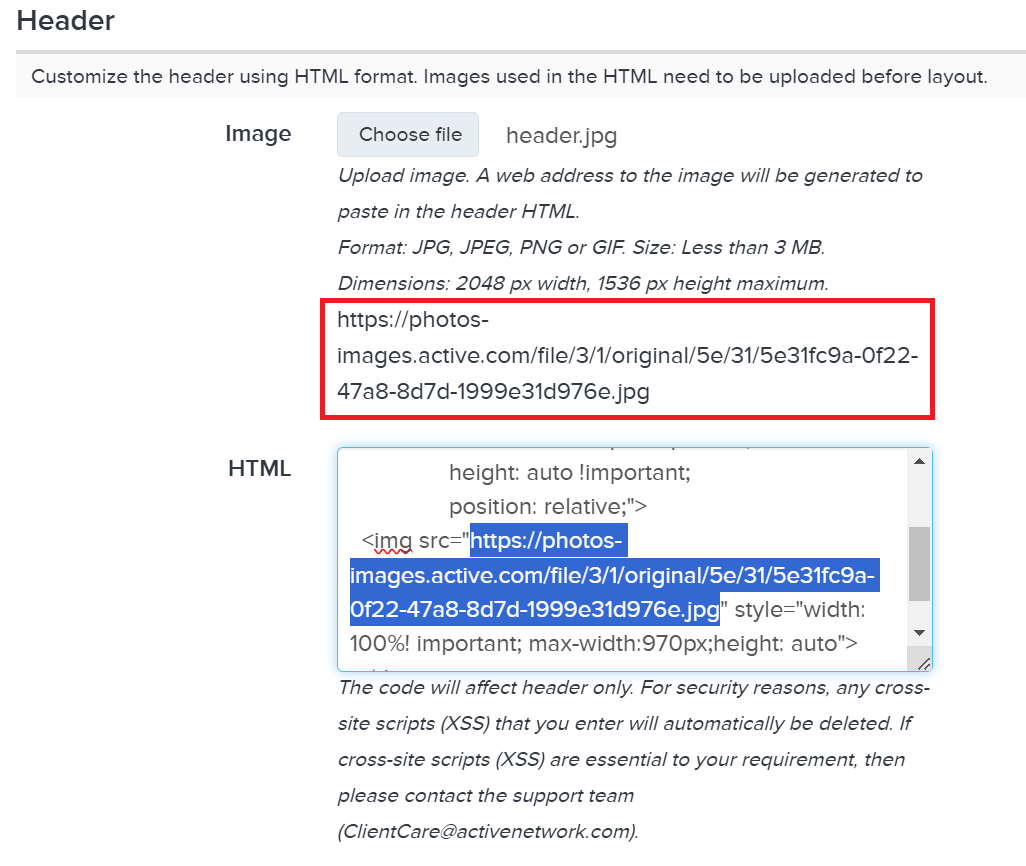
- For the Header choose the + sign under Images to generate an HTML link for your images. Select Copy link and the HTML code we be generated
HTML sample code: Header
<center> <img style="position:relative; width: 100%; max-width:970px; height:auto;" src="INSERT URL"></center>
- Repeat steps 6 for Footer if required
HTML sample code: Footer
<center> <img style="position:relative; width: 100%; max-width:970px; height:auto;" src="INSERT URL"></center>
- If the CSS option is enabled in your account, upload the file by clicking on Choose File under Content area
- Note: The file needs to be a Cascading Style Sheets (CSS) file. Below are the HTML sample codes regarding background in a css file:
HTML sample code: Background
.main-page {background:url(https://photos-images.active.com/file/3/1/original/0d/de/0ddef6a6-30ab-47ab-9e74-641f7ca5c9f4.jpg) no-repeat center fixed;
-webkit-background-size: cover;
-moz-background-size: cover;
-o-background-size: cover;
background-size: cover;
margin:0px;}
.container.ecui{max-width:970px!important;
background-color:rgba(255,255,255,0.85);
position: relative;}
- Click Save & Exit
- Note: If the Volunteer Module is enabled in your account, repeat the process to customize Volunteer Registration Form
- Note: If Race pass and Event Result Page are enabled, repeat steps 6 through 11 to customize
- Repeat steps 6 and 7 for the Email and click Save & Continue
- Click Select events and passes under Template setup at right side
- Check the box next to the event name and click Finish