To customize the confirmation email in other languages, please follow steps below:
1.
Log in to ACTIVE Works with Existing ACTIVE Passport Account2. Click selected event under Your events
3. Click
Setup4. Click
Emails sent out under Event setup on the right
5. Select
Fully customize content under Email settings
6. Click icon

next to design email
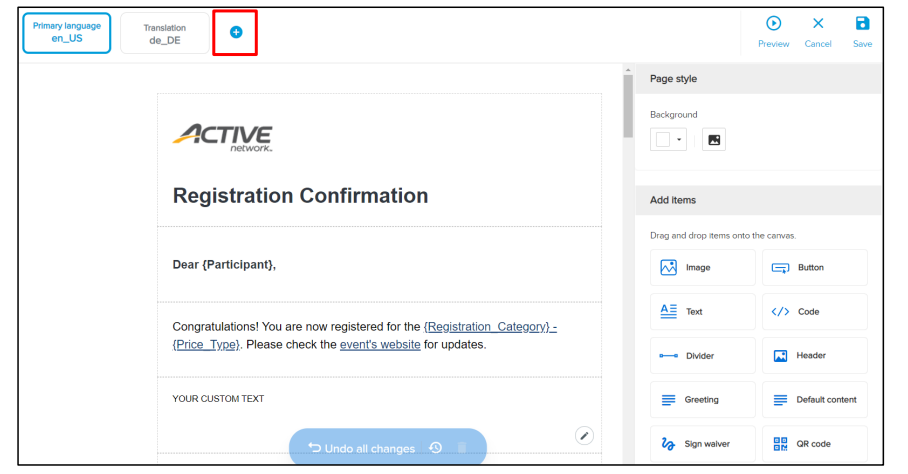
7. On the top-left side of page, click
+
8. In the
Translate based on dropdown, select the existing template on which to base the new template
9. In the
Select translation language list, select the language of the new template and click
Save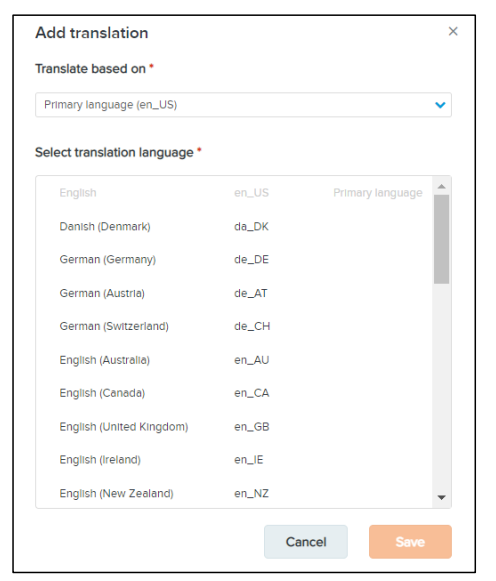
10. Click
Preview on the top right to preview the custom email before send out or click
Cancel to not add custom email in multiple language
11. Click
Save12. Click
Save & continueNote: For example, you have the following custom emails:
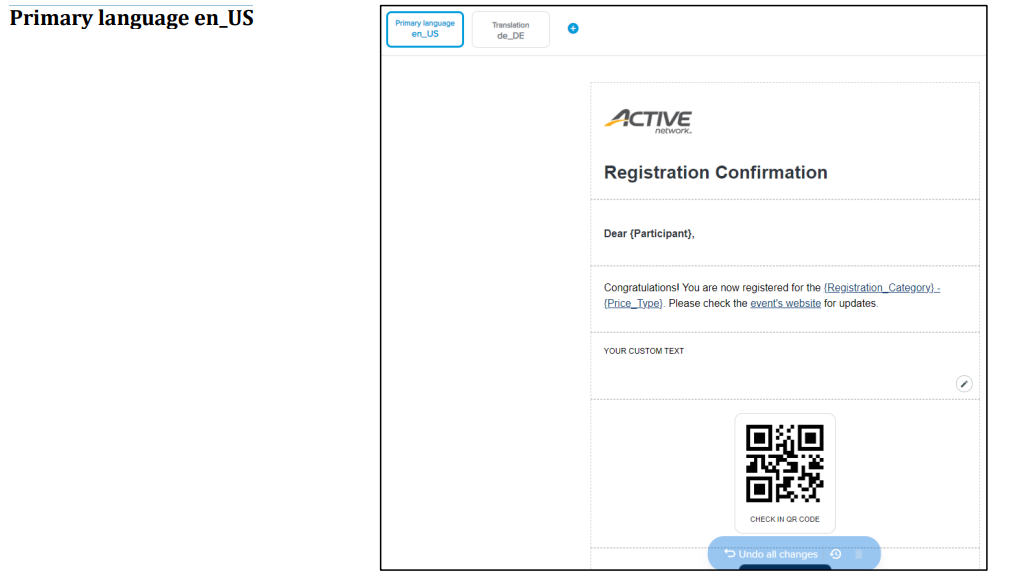
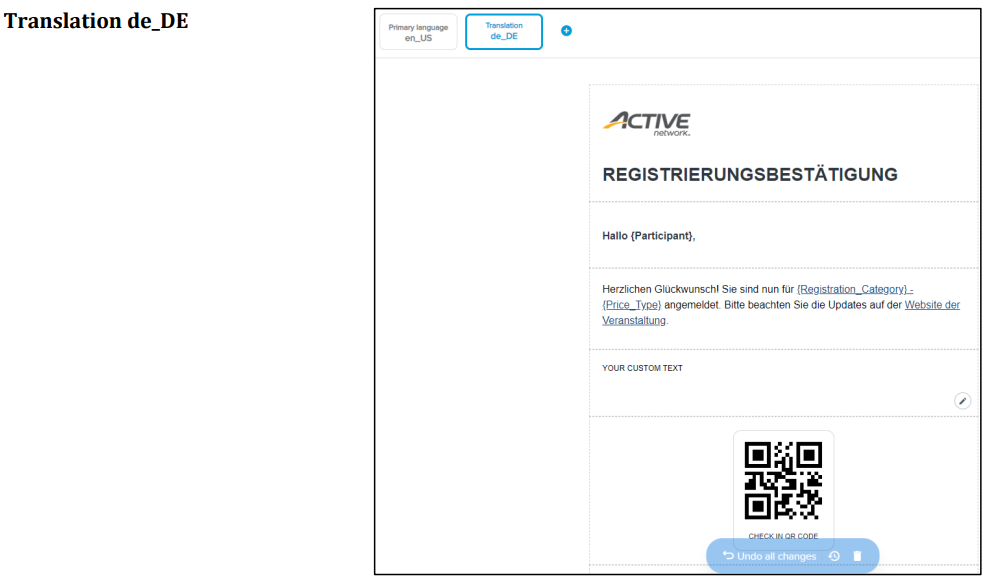
Your customers will then receive either of the following confirmation emails after registration:
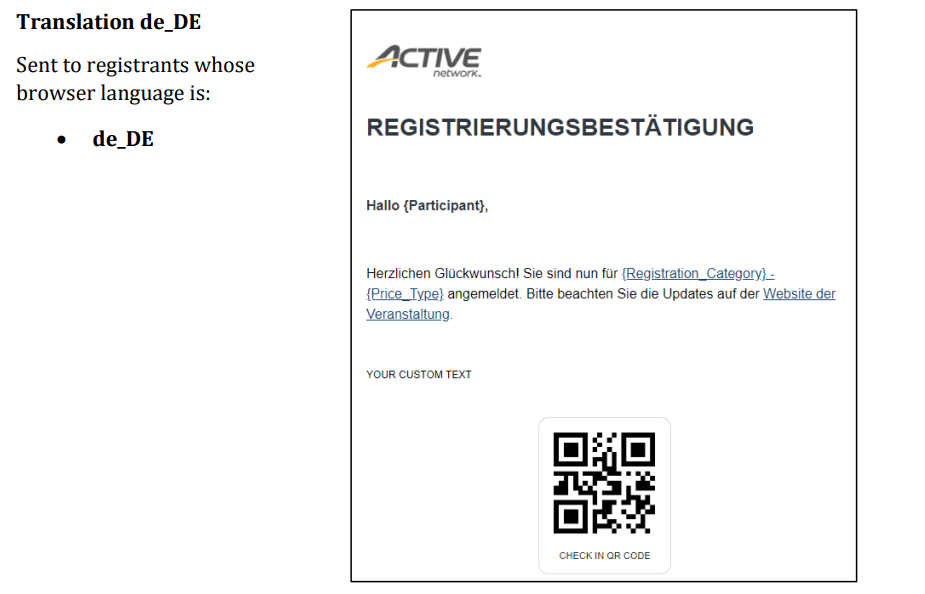
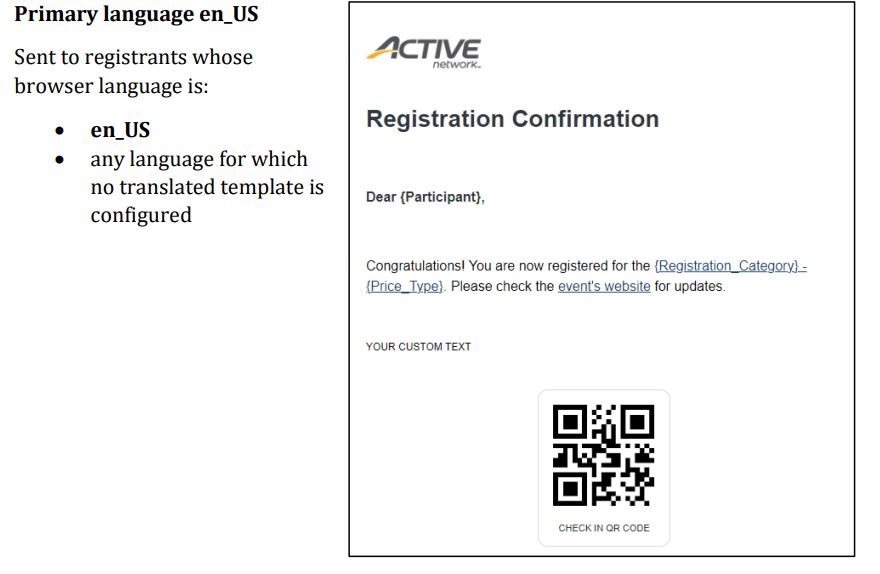
Note: All editable fields including Text fields, Button names, etc. remain in the same language as entered. In this example, all registrants of this event will see the custom text ‘YOUR CUSTOM TEXT’ (thus you must translate and re-enter this text in the required language).
Last Updated: 2/23/2023